- AI with Kyle
- Posts
- AI with Kyle Daily Update 133
What’s happening in the world of AI:

OpenAI Codex: Your Free AI Coding Tool
Yesterday I hopped on a call with the Codex team in San Francisco. I asked them questions, got excited, and now I want to get you set up!
This is not sponsored. Just my enthusiasm!
The big news: Codex is free for ChatGPT Free and Go users until early April. That's two months of free access to a proper AI coding tool. If you have a paid plan, your rate limit is doubled for the next two months.
The catch: Mac only for now. No Windows support yet.
And it’s a little bit tricky to get started with if you have zero coding experience. Don’t worry - that’s what I’m here for.
This guide will walk you through everything - even if you've never coded before.
What Is Codex?
Codex is OpenAI's coding assistant. It's been around for a while as a cloud tool at chatgpt.com/codex, but what's new is the Mac OS desktop app.
So what?
The app represents a shift in how we interact with code. Traditional development environments (IDEs) show you all the code and expect you to work with it directly. Codex is different - it's more like chatting with ChatGPT. You describe what you want, it builds it.
It's less code-heavy. You can access the code behind the scenes, but you don't have to stare at it constantly.
How it compares:
Tool | Cost | Ease of Use | Best For |
|---|---|---|---|
Lovable | $25/month | Easiest | Complete beginners who want instant results |
Google Antigravity | Free | Medium (looks like “real” IDE - well, it is!) | Those comfortable with developer interfaces |
Codex App | Free (for now) | Medium (chat-based) | Those who want ChatGPT-style interaction |
Claude Code | I pay $200/month | Technical | Experienced developers |
Cursor | $20/month then API costs | Medium | Professional developers |
Codex sits in a nice middle ground: chat-based interface (familiar), proper coding capabilities (powerful), free for two months (accessible).
I personally use Lovable, Claude Code and now Codex. Yes yes I know I have a problem!
The Two Barriers (And How to Overcome Them)
Heads up on the two barriers that make Codex a little trickier for beginners are :
GitHub - You need this for version control and you’ll need to set it up (even if you have no idea what Github is…)
Deployment - You need this to actually see your app
I spoke to the Codex team about making this easier for beginners. They confirmed: there are no plans for a built-in preview panel. You need to handle deployment yourself.
I'll show you the easiest way to handle both.
📋 Step-by-Step Setup Guide
I ran through this on my livestream. Check the full video to follow along!
Step 1: Download the Codex Mac App
Go to chatgpt.com/codex and download the Mac OS app.
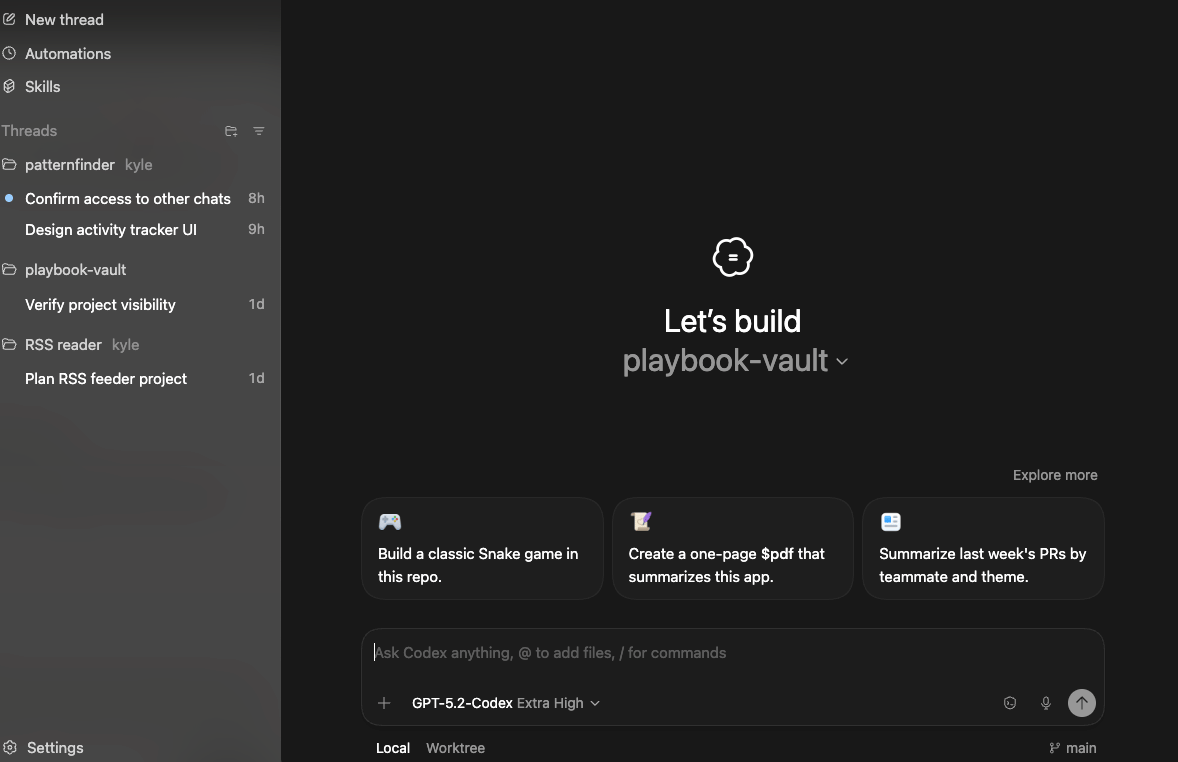
When you open it, you'll see a chat interface. If you've used ChatGPT, this will look familiar.
Step 2: Create Your Project Folder
Click "New Thread" to start a new project.
Codex will ask you to create or select a folder. Create a new folder somewhere easy to find (like your Desktop):
Desktop → Projects → [Your App Name]This folder is where all your project files will live.
Step 3: Use Planning Mode
Before building anything, put Codex into planning mode:
Type /plan or just say "Can we plan this first?"
Why this matters: Without planning mode, AI models tend to rush off and start building before you've properly defined what you want. Planning mode keeps it in discussion mode.
Spend more time planning than building. The more work you do upfront, the better your application will be.
Step 4: Describe Your App
Talk to Codex like you'd talk to a developer you're hiring. Describe:
What the app does
Who it's for
What screens/features you want
Whether it's a web app, mobile app, etc.
Example prompt:
"I want to build a web app that tracks daily activities and finds patterns over time. Users tap buttons to log what they did each day, then the app shows correlations between activities and their mood/energy levels."
Codex will ask clarifying questions. Answer them. This back-and-forth creates a detailed project plan. In my livestream you’ll see that Codex pelted me with questions. The more questions you answer the better Codex will be able to build for you.
I actually had to tell it to stop eventually!
Step 5: Choose Your Intelligence Level
Codex has three modes:
Medium - Faster, uses less capacity, good for simple tasks
High - Balanced
Extra High - Slower but more thorough, good for complex planning
Use Extra High for initial planning and complex features. Use Medium for quick fixes.
Note: Extra High uses more of your daily capacity so use it for the most advanced tasks.
Step 6: Let It Build
When planning is done, tell it to build: “ok let’s build” or similar.
Be patient. Codex is slower than Claude Code. A task might take 20+ minutes where Claude Code would finish in a few minutes. But it's thorough! It’s worth the longer time.
Pro tip: While one thread is building, you can start a new thread in the same project to work on something else. For example:
Thread 1: Building the main app
Thread 2: Creating a marketing landing page
Thread 3: Working on a specific feature
Multiple agents can work on the same project simultaneously. No need to do this immediately but keep this in mind as Codex is a lot more “asynchronous” that other AI coding tools.
Step 7a: Preview Your App Locally
Now the slightly annoying part. There’s no easy “Preview pain” so Codex can’t just show us the app we’re building.
To see what you've built, you need to run it locally. Pro tip? Just ask!
Literally ask Codex "How do I preview this locally?"
It will give you terminal commands. The basic process will look like this:
Open Terminal on your Mac (press Cmd+Space and type terminal)
Navigate to your project folder:
cd Desktop/Projects/YourAppNameInstall dependencies:
npm installStart the dev server:
npm run devOpen your browser to
http://localhost:3000
Don't panic about the terminal. This stuff LOOKS scary. And it is the first time you see it. That’s cool. If you get stuck, paste the error back into Codex and ask for help. You can also say "I don't understand that, give me a simpler way."
Step 7b: Deploy with Vercel (Quick Method)
This is an alternative method. You can deploy your site/app to Vercel. Vercel is a hosting service where your app can “live” later. As we progress we’ll want to get it onto a service like this but the setup can be a little fiddly the first time.
Thankfully Codex has a Skill called Vercel Deploy. Click Skills then Vercel Deploy to add it to your project.
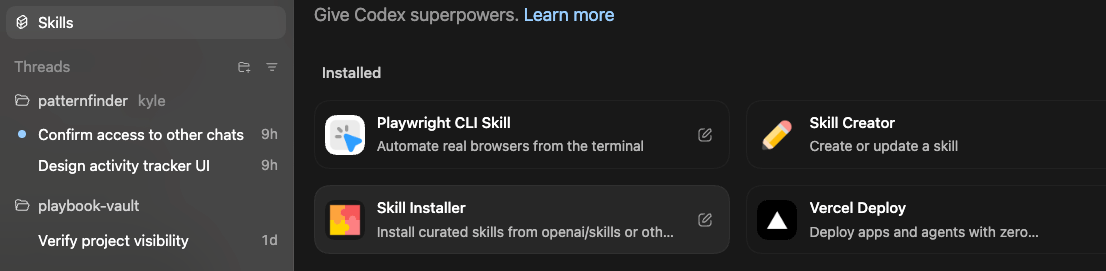
Then to trigger it in chat use /vercel or just ask for Codex to deploy to Vercel.
This will deploy to Vercel without you needing to make a Vercel account. Neat!
It will create a public URL you can share. This is good for a quick first look.
You can also sign up for a Vercel account (free) and import your project. It’s free to use until you reach a certain amount of traffic or usage. The free plan is pretty generous though!
OR use the localhost method above. That’s fine too. Both work for previewing your work.
Step 9: Connect GitHub (Important!)
GitHub is like cloud saves for your project. It keeps all previous versions, so if you break something, you can roll back.
The easiest method (no terminal required):
Create a free account at github.com
Download GitHub Desktop
Open GitHub Desktop
Click "Add" → "Add Existing Repository"
Find your project folder (Desktop → Projects → YourAppName)
Click "Add Repository"
Click "Publish Repository"
Done. Your project is now saved to GitHub.
Why bother?
Version history (undo mistakes)
Branching (test new features without breaking the live app)
Auto-deployment (connect GitHub to Vercel for automatic updates)
Collaboration (multiple people can work on the same project)
Alternative: You can also connect GitHub through the cloud version of Codex at chatgpt.com/codex. There's a dropdown to configure repositories directly.
If you want to know more about what Github is read this guide.
You can also install git and connect to Github via the terminal but we’re keeping this simple!
Step 10: Fix Errors
You’ve got your app preview up. You can play around with it. Kick the tyres.
Your app will have bugs. That's normal.
When you see an error:
Copy the error message (from the browser console or the app)
Paste it into Codex
Say "I have this error when going to [page name]"
Codex will find and fix it
Repeat until it works. This back-and-forth is the actual process of building software. This is the basic flow. Does knowing what the bugs are help? Of course. And there are many ways to fix and improve your software. BUT this quick and dirty method of copying in a bug and letting the AI deal with it will get you a long way. As a beginner this is the first step.
Hey! You’re now vibe coding! Pretty cool huh? Want to learn more about vibe coding? I put together this guide here: https://aiwithkyle.com/what-is-vibe-coding
💡 Key Takeaways
Codex is free until early April - No excuse not to try it
Mac only for now
Use planning mode - Spend more time planning than building
GitHub Desktop is the easiest way to handle version control
Ask Codex when stuck - It can explain things simply if you ask
Be patient - Codex is slower than Claude Code but thorough
Multiple threads - Work on different features simultaneously
Errors are normal - Copy, paste, fix, repeat
The Bigger Picture
I know people criticise AI coding - "you don't actually understand the real skills."
Ignore them.
This is a gateway to understanding those skills. By building stuff, you'll learn what GitHub is, what Vercel does, what a localhost is. You're learning by doing.
If you have an app idea, create it. The barrier has been removed.
Want the full unfiltered discussion? Join me tomorrow for the daily AI news live stream where we dig into the stories and you can ask questions directly.